- Install Ubuntu 18.04 LTS UEFI with GPU
- Ubuntu update and preparation
- Install CUDA and Nvidia driver
- Uninstall CUDA
Install Ubuntu 18.04 LTS UEFI with GPU
I made Ubuntu 18.04.3 LTS for Desktop BOOT USB flush memory with using Rufus.exe for Windows.

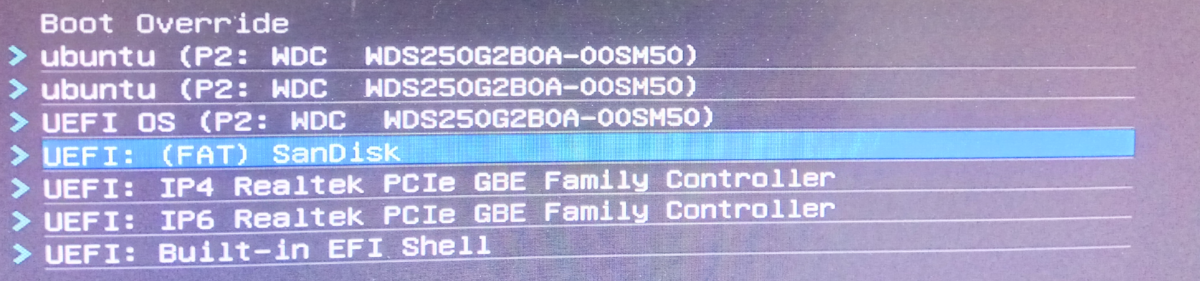
Insert the flush memory into USB2.0 port of M/B, Boot as UEFI.
After booting,
GNU GRUB version 2.02

 Try Ubuntu without installing
*Install Ubuntu
 OEM install (for manufactures)
 Check disk or defects
Press e with Install Ubuntu selected.
Insert nomodeset just after --- with space at the end of the line starting with linux.
If you don't, the screen image will be broken and the installation will not proceed.
The ending of \ means wrapping, so do not actually enter it.

Press F10 and continue to install.
English-> Continue
Japanese -> Japanese -> Continue
Normal installation
Download updates while installing Ubuntu -> Continue
Erase disk and install Ubuntu -> Install Now -> Continue
Tokyo -> Continue
Set your User name, Hostname, and password
Ubuntu update and preparation
Update, upgrade, and install build tools with the following command.
sudo apt update
sudo apt upgrade
sudo apt install build-essential
Install CUDA and Nvidia driver
From upper URL, select the version of CUDA. Choose OS and CPU type.
The Installer Type should be dev (local).
I failed with runtime (local).
Execute the command line by line as just written.
The following is an example of CUDA10.2. The apt-get was rewritten to apt.
wget https://developer.download.nvidia.com/compute/cuda/repos/ubuntu1804/x86_64/cuda-ubuntu1804.pin
sudo mv cuda-ubuntu1804.pin /etc/apt/preferences.d/cuda-repository-pin-600
wget http://developer.download.nvidia.com/compute/cuda/10.2/Prod/local_installers/cuda-repo-ubuntu1804-10-2-local-10.2.89-440.33.01_1.0-1_amd64.deb
sudo dpkg -i cuda-repo-ubuntu1804-10-2-local-10.2.89-440.33.01_1.0-1_amd64.deb
sudo apt-key add /var/cuda-repo-10-2-local-10.2.89-440.33.01/7fa2af80.pub
sudo apt update
The size of cuda-repo-ubuntu1804-10-2-local-10.2.89-440.33.01_1.0-1_amd64.deb about 1.8GB, so it takes much time to download.
Execute
sudo apt -y install cuda
The installer asks several questions.

Create the password with 8 to 16 characters. Anything would be fine. Remember until after reboot.

Password confirmation.

Completed and reboot
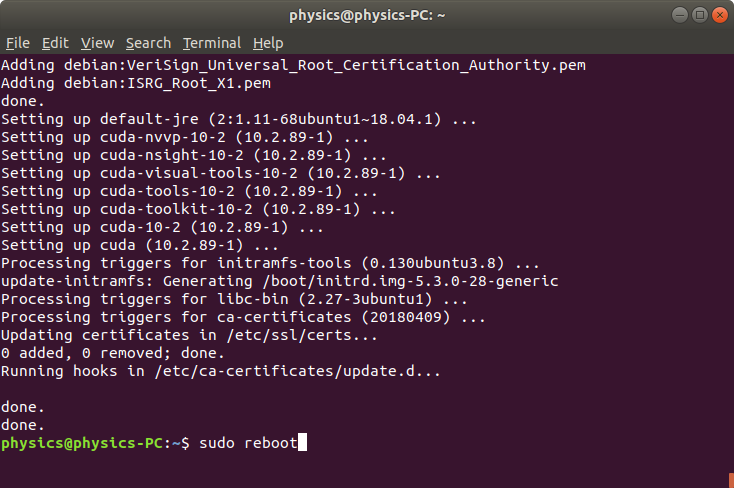
sudo reboot
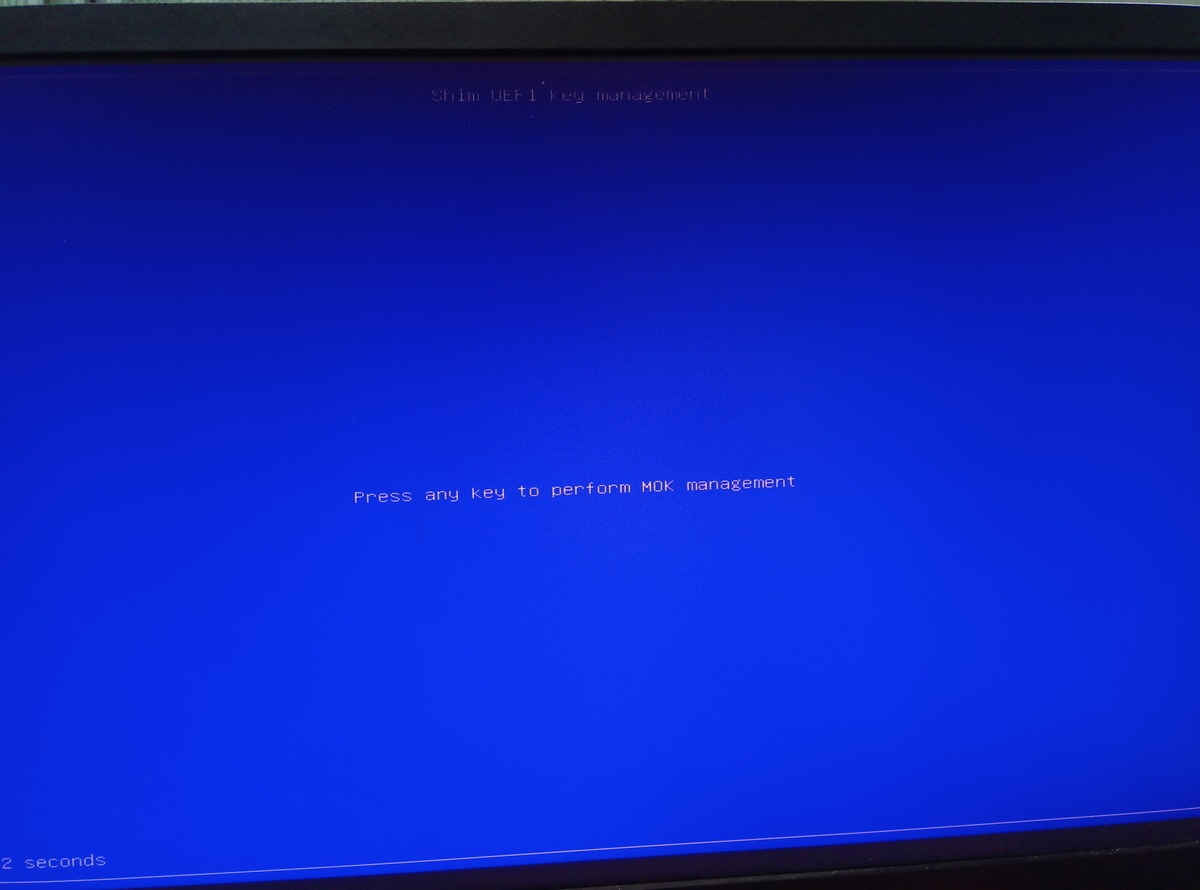
Press something quickly.
Enroll MOK ->
Continue ->
Yes ->
Password which you created ->
Reboot ->
After rebooting, Run nvidia-smi nvcc -V to confirm that the installation was successful.
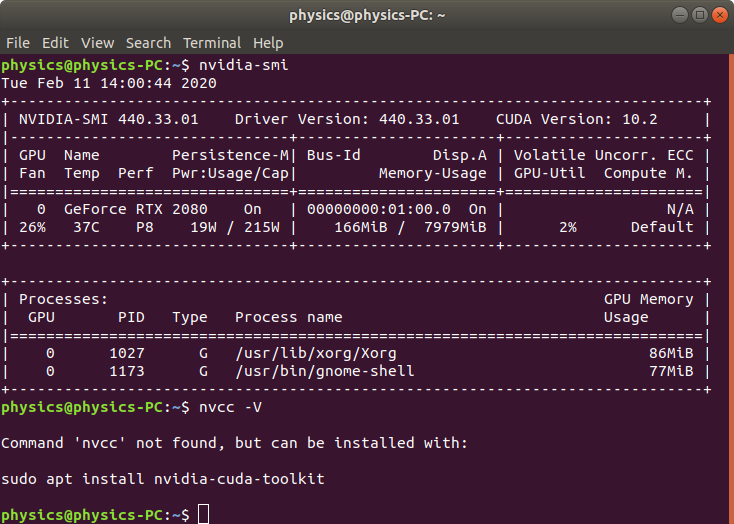
You can find that PATH does not set to nvcc.
So add PATH and library PATH at the end of ~/.bashrc.
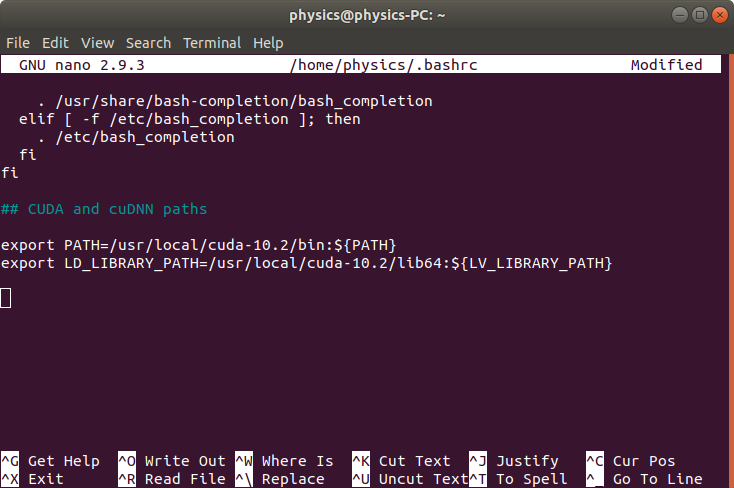
## CUDA and cuDNN paths
export PATH=/usr/local/cuda-10.2/bin:${PATH}
export LD_LIBRARY_PATH=/usr/local/cuda-10.2/lib64:${LD_LIBRARY_PATH}
Reload ~/.bashrc
$ source ~/.bashrc
The current user can use the nvcc command.
$ nvcc -V
nvcc: NVIDIA (R) Cuda compiler driver
Copyright (c) 2005-2019 NVIDIA Corporation
Built on Wed_Oct_23_19:24:38_PDT_2019
Cuda compilation tools, release 10.2, V10.2.89

Uninstall CUDA
If you want to uninstall CUDA and NVIDIA driver, run the following command.
sudo apt remove cuda-10-2
sudo apt autoremove
sudo reboot
Reference: