論文をカテゴリ別に管理するのにめっちゃ便利なZetro。
日本語完全対応。OS非依存。クラウドは一切使わず、ローカルのディレクトリだけで完結している。
万が一パソコンが壊れても、データ・ディレクトリの場所をクラウドで同期するフォルダ上に保存しておけば、パソコン間でも同期できる。OSをまたいで同期できるかどうかは検証してない(が出来る気がする)。

Ubuntuの設定画面→詳細→ユーザーから、あるユーザーにおける自動ログイン(Automatic Login)を有効にしても、自動ログインできないことがあった。
結果的に理由は単純で、自動ログインの設定後、デスクトップサービスをデフォルトのdgm3ではなくlightdmに変更したため、lightdmの設定ファイル内に自動ログインの設定が記述されていなかった。
まずは、lightdmのログを確認してみる。
sudo cat /var/log/lightdm/lightdm.log
後半は省略するが、こちらの環境では以下のように出力されていた。
[+0.00s] DEBUG: Logging to /var/log/lightdm/lightdm.log
[+0.00s] DEBUG: Starting Light Display Manager 1.26.0, UID=0 PID=1313
[+0.00s] DEBUG: Loading configuration dirs from /usr/share/lightdm/lightdm.conf.d
[+0.00s] DEBUG: Loading configuration from /usr/share/lightdm/lightdm.conf.d/50-disable-guest.conf
[+0.00s] DEBUG: Loading configuration from /usr/share/lightdm/lightdm.conf.d/50-disable-log-backup.conf
[+0.00s] DEBUG: Loading configuration from /usr/share/lightdm/lightdm.conf.d/50-greeter-wrapper.conf
[+0.00s] DEBUG: Loading configuration from /usr/share/lightdm/lightdm.conf.d/50-guest-wrapper.conf
[+0.00s] DEBUG: Loading configuration from /usr/share/lightdm/lightdm.conf.d/50-ubuntu.conf
[+0.00s] DEBUG: Loading configuration from /usr/share/lightdm/lightdm.conf.d/50-unity-greeter.conf
[+0.00s] DEBUG: Loading configuration from /usr/share/lightdm/lightdm.conf.d/50-xserver-command.conf
[+0.00s] DEBUG: Loading configuration from /usr/share/lightdm/lightdm.conf.d/60-lightdm-gtk-greeter.conf
[+0.00s] DEBUG: Loading configuration from /usr/share/lightdm/lightdm.conf.d/90-nvidia.conf
[+0.00s] DEBUG:   [SeatDefaults] is now called [Seat:*], please update this configuration
[+0.00s] DEBUG: Loading configuration dirs from /usr/local/share/lightdm/lightdm.conf.d
[+0.00s] DEBUG: Loading configuration dirs from /etc/xdg/lightdm/lightdm.conf.d
[+0.00s] DEBUG: Loading configuration from /etc/lightdm/lightdm.conf
[+0.00s] DEBUG: Registered seat module local
以下省略
ここで重要なのは最後の方の /etc/lightdm/lightdm.conf という設定ファイル。当方の環境ではこの設定ファイルに何も書かれていなかった。そこで、下記の記事を参考に
Ubuntu 16.04の自動ログインが効かなくなった。 – Yuji Noizumi's blog
[Seat:*]
autologin-guest=false
autologin-user-timeout=0
autologin-session=lightdm-autologin
autologin-user=administrator

と書いてみた。当方の環境での自動ログイン用ユーザーはadministratorなので適宜置き換えてほしい。これで次の再起動後から、自動ログオンが有効になった。
I made Ubuntu 18.04.3 LTS for Desktop BOOT USB flush memory with using Rufus.exe for Windows.

Insert the flush memory into USB2.0 port of M/B, Boot as UEFI.
After booting,
GNU GRUB version 2.02

 Try Ubuntu without installing
*Install Ubuntu
 OEM install (for manufactures)
 Check disk or defects
Press e with Install Ubuntu selected.
Insert nomodeset just after --- with space at the end of the line starting with linux.
If you don't, the screen image will be broken and the installation will not proceed.
The ending of \ means wrapping, so do not actually enter it.

Press F10 and continue to install.
English-> Continue
Japanese -> Japanese -> Continue
Normal installation
Download updates while installing Ubuntu -> Continue
Erase disk and install Ubuntu -> Install Now -> Continue
Tokyo -> Continue
Set your User name, Hostname, and password
Update, upgrade, and install build tools with the following command.
sudo apt update
sudo apt upgrade
sudo apt install build-essential
From upper URL, select the version of CUDA. Choose OS and CPU type.
The Installer Type should be dev (local).
I failed with runtime (local).
Execute the command line by line as just written.
The following is an example of CUDA10.2. The apt-get was rewritten to apt.
wget https://developer.download.nvidia.com/compute/cuda/repos/ubuntu1804/x86_64/cuda-ubuntu1804.pin
sudo mv cuda-ubuntu1804.pin /etc/apt/preferences.d/cuda-repository-pin-600
wget http://developer.download.nvidia.com/compute/cuda/10.2/Prod/local_installers/cuda-repo-ubuntu1804-10-2-local-10.2.89-440.33.01_1.0-1_amd64.deb
sudo dpkg -i cuda-repo-ubuntu1804-10-2-local-10.2.89-440.33.01_1.0-1_amd64.deb
sudo apt-key add /var/cuda-repo-10-2-local-10.2.89-440.33.01/7fa2af80.pub
sudo apt update
The size of cuda-repo-ubuntu1804-10-2-local-10.2.89-440.33.01_1.0-1_amd64.deb about 1.8GB, so it takes much time to download.
Execute
sudo apt -y install cuda
The installer asks several questions.

Create the password with 8 to 16 characters. Anything would be fine. Remember until after reboot.

Password confirmation.

Completed and reboot
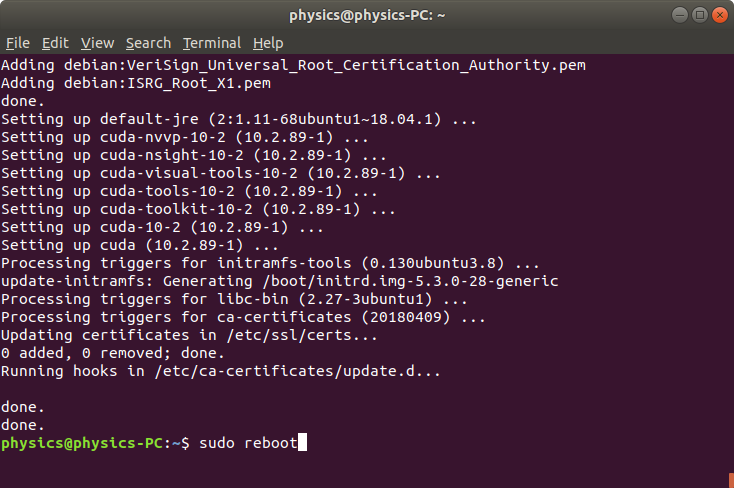
sudo reboot
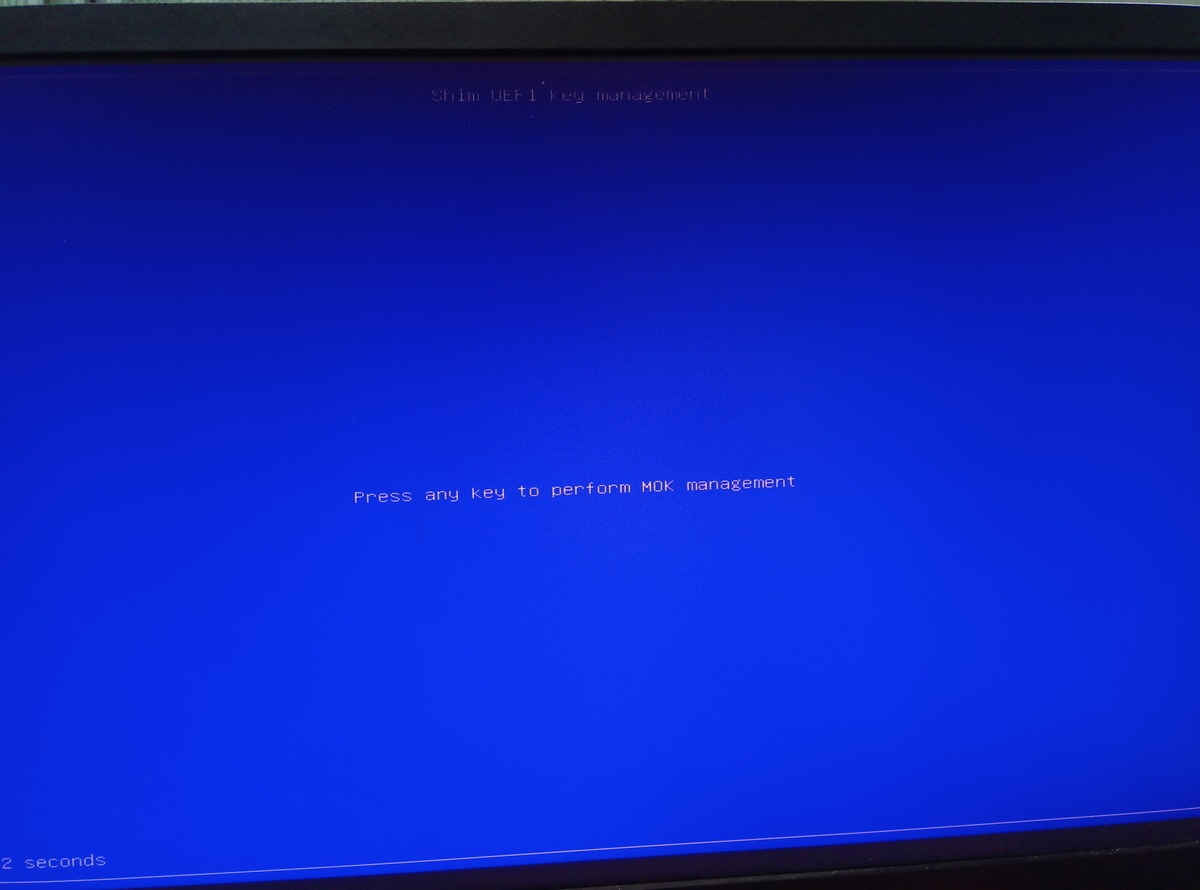
Press something quickly.
Enroll MOK ->
Continue ->
Yes ->
Password which you created ->
Reboot ->
After rebooting, Run nvidia-smi nvcc -V to confirm that the installation was successful.
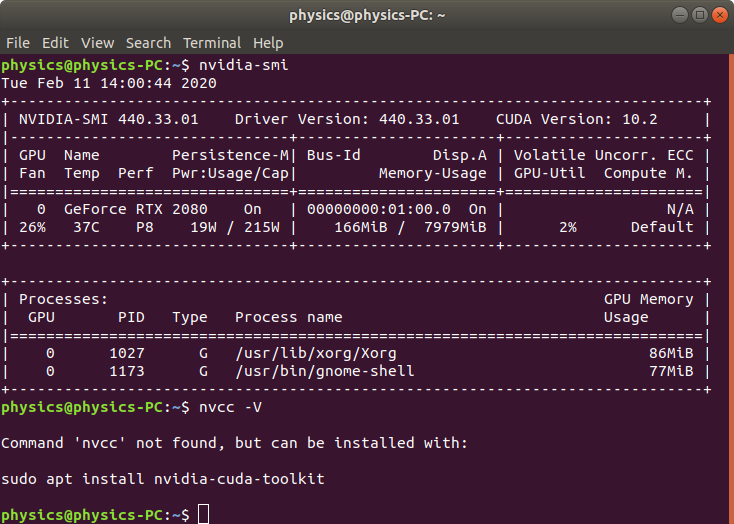
You can find that PATH does not set to nvcc.
So add PATH and library PATH at the end of ~/.bashrc.
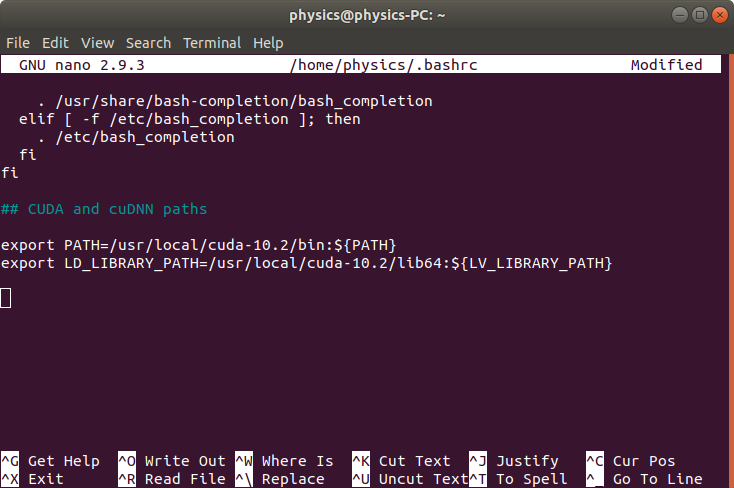
## CUDA and cuDNN paths
export PATH=/usr/local/cuda-10.2/bin:${PATH}
export LD_LIBRARY_PATH=/usr/local/cuda-10.2/lib64:${LD_LIBRARY_PATH}
Reload ~/.bashrc
$ source ~/.bashrc
The current user can use the nvcc command.
$ nvcc -V
nvcc: NVIDIA (R) Cuda compiler driver
Copyright (c) 2005-2019 NVIDIA Corporation
Built on Wed_Oct_23_19:24:38_PDT_2019
Cuda compilation tools, release 10.2, V10.2.89

If you want to uninstall CUDA and NVIDIA driver, run the following command.
sudo apt remove cuda-10-2
sudo apt autoremove
sudo reboot
Reference:
の記事を書いてから思った。CUDAに付属しているNVIDIAのドライバと、NVIDIAが出してる最新ドライバのバージョンは違うから、バージョン衝突が起きるんじゃない? と。
$ nvidia-smi
Failed to initialize NVML: Driver/library version mismatch
と出るんですね。再起動すれば治るんだが、せっかくなのでクリーンインストールしてみた。以下、前日の記事との重複もあるが、最初から作業ができるように書いておく。
Windowsで使えるRufus.exeで、USBフラッシュメモリにUbuntu 18.04.3 LTS デスクトップ版を入れた。

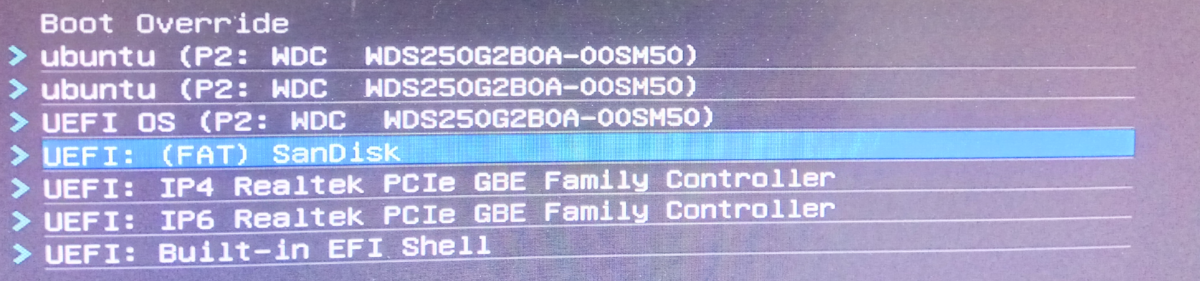
M/BのUSB2.0のポートに差し、UEFIでbootする*1。
そのまま進むと
GNU GRUB version 2.02

 Try Ubuntu without installing
*Install Ubuntu
 OEM install (for manufactures)
 Check disk or defects
と出てくるので、Install Ubuntuを選択した状態でeを押す。
linuxから始まる行の最後、---のあとにスペースを入れてさらにnomodesetと入れる。この設定をしておかないと、画面が壊れたみたいになってインストールが進まない。(画面上で文尾に\が入っているのはwrapの意味なので実際には入力しない)
F10でブートに進み、英語版をインストールする。
English-> Continue
Japanese -> Japanese -> Continue
Normal installation or Minimal installation
Download updates while installing Ubuntu -> Continue
Erase disk and install Ubuntu -> Install Now -> Continue
Tokyo -> Continue
User name, Hostname, and password を設定する
以下のコマンドで、アップデート、アップグレード、ビルドツールのインストールしておく。
sudo apt update
sudo apt upgrade
sudo apt install build-essential
から、使いたいCUDAのバージョンを選ぶ。OSやCPUを選ぶ。Installer Typeは dev(local) が良いだろう。 runtime(local) はこちらの環境だとエラーが出てうまくいかなかった*2。
とにかく、書かれているコマンド通り1行づつ実行する。下記は、CUDA10.2の例、apt-getをaptに書き換えた。
wget https://developer.download.nvidia.com/compute/cuda/repos/ubuntu1804/x86_64/cuda-ubuntu1804.pin
sudo mv cuda-ubuntu1804.pin /etc/apt/preferences.d/cuda-repository-pin-600
wget http://developer.download.nvidia.com/compute/cuda/10.2/Prod/local_installers/cuda-repo-ubuntu1804-10-2-local-10.2.89-440.33.01_1.0-1_amd64.deb
sudo dpkg -i cuda-repo-ubuntu1804-10-2-local-10.2.89-440.33.01_1.0-1_amd64.deb
sudo apt-key add /var/cuda-repo-10-2-local-10.2.89-440.33.01/7fa2af80.pub
sudo apt update
cuda-repo-ubuntu1804-10-2-local-10.2.89-440.33.01_1.0-1_amd64.deb は約1.8GBあるので、ダウンロードにかなり時間がかかる。
sudo apt -y install cuda
を実行すると、いくつかの問いが出てくる。
UEFIセキュアブートが有効になってるから、サードパーティー製ドライバを入れるときは Enroll しなきゃいけないよ
パスワードを8文字~16文字で作成する。何でも良いはず。再起動後まで覚えておく。
パスワードの再確認
完了して再起動
sudo reboot
MOKマネージメント画面。青背景で Press any key to perform MOK management と出てくる。
ので素早く何かを押す。
Enroll MOK ->
Continue ->
Yes ->
パスワード ->
Reboot ->
と選択、ドライバをインストール中に作ったパスワードを入力する。
再起動後、インストールが正しく行われたことを確認するために、 nvidia-smi nvcc -Vを実行する。
nvcc にはPATHが通っていないことが分かる。なので、~/.bashrc の末尾にPATHとライブラリPATHを追加する。
## CUDA and cuDNN paths
export PATH=/usr/local/cuda-10.2/bin:${PATH}
export LD_LIBRARY_PATH=/usr/local/cuda-10.2/lib64:${LD_LIBRARY_PATH}
~/.bashrc を読み込む
$ source ~/.bashrc
これで、作業しているユーザーは、nvccコマンドが使えるようになる。
$ nvcc -V
nvcc: NVIDIA (R) Cuda compiler driver
Copyright (c) 2005-2019 NVIDIA Corporation
Built on Wed_Oct_23_19:24:38_PDT_2019
Cuda compilation tools, release 10.2, V10.2.89
https://developer.nvidia.com/rdp/cudnn-download からNVIDIA CUDA Deep Neural Network library (cuDNN)をダウンロードする。アカウント作成とライセンスへの同意が必要。

Ubuntu 18.04用のDebファイルを3つダウンロードしておく

dpkg でインストール。apt install ではうまくいかなかった。
sudo dpkg -i libcudnn7_7.6.5.32-1+cuda10.2_amd64.deb
sudo dpkg -i libcudnn7-dev_7.6.5.32-1+cuda10.2_amd64.deb
sudo dpkg -i libcudnn7-doc_7.6.5.32-1+cuda10.2_amd64.deb
サンプルプログラムのコンパイルと実行
cuda-install-samples-10.2.sh ~
cd ~/NVIDIA_CUDA-10.2_Samples/
make -k
cd 2_Graphics/volumeRender
./volumeRender
マウスでグリグリできる3DのCGが出てくる

CUDAのアンインストール
sudo apt remove cuda-10-2
sudo apt autoremove
cuDNNのアンインストール
sudo apt remove libcudnn7 libcudnn7-dev libcudnn7-doc
参考文献、というかパクリ元
CUDAと一緒にインストールする場合は、Ubuntu 18.04 LTS UEFIにNVIDIA CUDAとcuDNNをインストールする方法を見てほしい。
Windowsで使えるRufus.exeで、USBフラッシュメモリにUbuntu 18.04.3 LTS デスクトップ版を入れた。
M/BのUSB2.0のポートに差し、UEFIでbootする*1。
そのまま進むと
GNU GRUB version 2.02

 Try Ubuntu without installing
*Install Ubuntu
 OEM install (for manufactures)
 Check disk or defects
と出てくるので、Install Ubuntuを選択した状態でeを押す。
linuxから始まる行の最後、---のあとにスペースを入れてさらにnomodesetと入れる。この設定をしておかないと、画面が壊れたみたいになってインストールが進まない。(画面上で文尾に\が入っているのはwrapの意味なので実際には入力しない)
F10でブートに進み、英語版をインストールする。
English-> Continue
Japanese -> Japanese -> Continue
Normal installation or Minimal installation
Download updates while installing Ubuntu -> Continue
Erase disk and install Ubuntu -> Install Now -> Continue
Tokyo -> Continue
User name, Hostname, and password を設定する
Ubuntuが無事立ち上がったのを確認し、設定画面からグラフィックスが llvmpipe (LLVM 8.0, 256bit) になっているのを確認しておく。

Ctrl+Alt+T でターミナルを開き、 build-essential をインストールする。また、NVIDIAが配布するLinux用のシェルスクリプトをダウンロードし、実行権限を与える。
sudo apt update
sudo apt install -y build-essential

cd Download
wget http://us.download.nvidia.com/XFree86/Linux-x86_64/440.59/NVIDIA-Linux-x86_64-440.59.run

chmod u+x NVIDIA-Linux-x86_64-440.59.run
シェルスクリプトを実行する。
sudo ./NVIDIA-Linux-x86_64-440.59.run
ここからが若干ややこしいが、正しい選択肢を選んでいくだけである。正しい選択肢は以下の通りだと思う。間違ってたら教えてほしい。
スクリプトがうまくいってないけどとにかくインストールを続ける

カーネルモジュールに署名する

新しい鍵ペアを作成する

プライベートキーは削除しておく

公開鍵の場所と指紋

とりあえず署名したカーネルモジュールをインストール

32bit版は不要なのでOKで

よく分からないけどインストール

インストール中

おせっかいしていい?

完了したよ。

次に、セキュア・ブートで使用される鍵および証明書を管理するmokutilで、鍵証明書をインポートする。パスワードを2度聞かれる。XXXXXXXXには公開鍵のところで出てきた8桁の16進数の文字が入るはずである。
sudo mokutil --import /usr/share/nvidia/nvidia-modsign-crt-XXXXXXXX.der
その後、再起動
sudo reboot
青背景で Press any key to perform MOK management と出てくる
ので素早く何かを押す。ここで押さないと、もう一度 mokutil --import をする必要が出てくる。
Enroll MOK ->
Continue ->
Yes ->
パスワード ->
Reboot ->
と選択、ドライバをインストール中に作ったパスワードを入力し、importを完了させる。
再起動後、設定画面を見ると、確かに GeForce RTX 2080が認識されている。

ドライバーのバージョンも440.59が正しく認識されている。

UbuntuのUEFIでもNVIDIAのドライバをインストールできたぞ。
ここまでやっておいて何だが、Cuda Toolkitと両立しないため、CUDAと一緒にインストールする場合は、Ubuntu 18.04 LTS UEFIにNVIDIA CUDAとcuDNNをインストールする方法を見てほしい。
*1:写真は既にUbuntuを入れた後でのクリーンインストールなのでUbuntuが見えてる